How to paint a realistic peeled lemon in oil

How to paint peeled lemon in oil Today I want to show you step by step process of how I painted the still life of peeled lemon. This painting is part of my still life series that I have been working on this year. I planned to paint fruit, flowers and objects that have a range of symbolic meanings. The peeled lemon is probably one of the most popular symbolic objects that many artists used it to feature in their painting from 17th century Dutch Still Life paintings up until now. So let's start it.
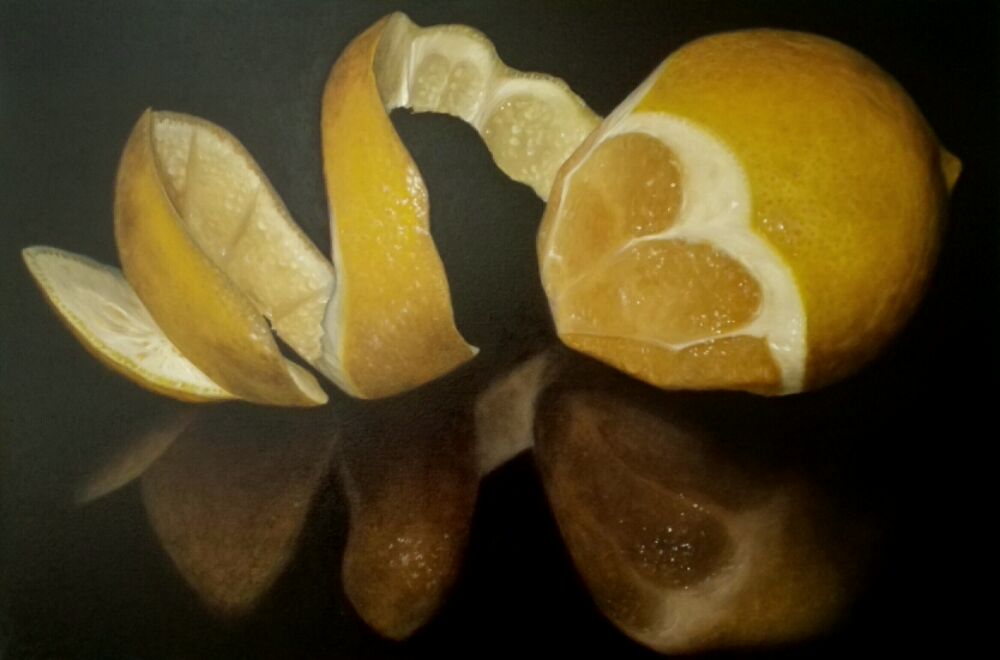
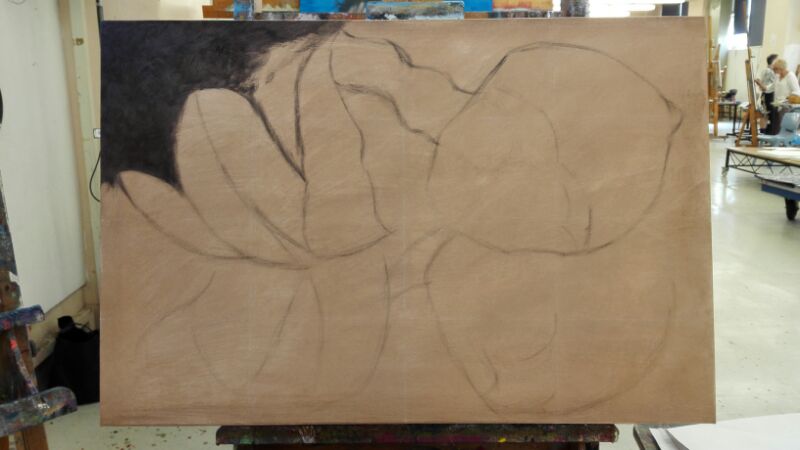
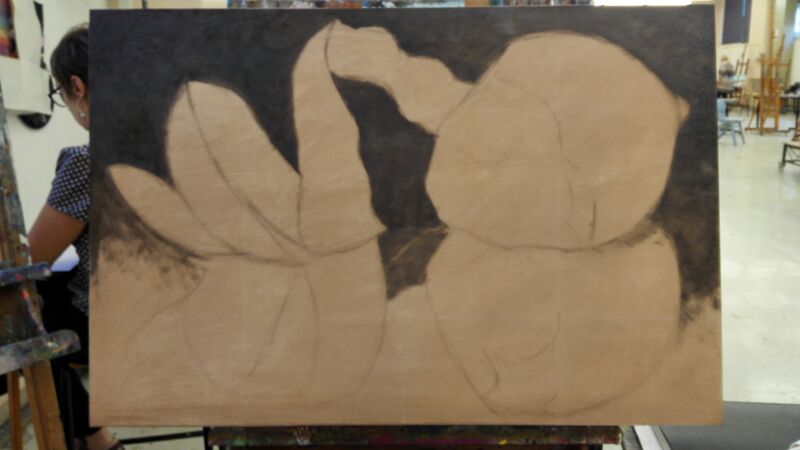
Material I used 1. Pre-stretched canvas 60 x 90 cm.2. Oil paint. I use AS or Art Spectrum brand. Colour : Ivory black, Titanium white, Lemon yellow, Yellow ochre, Burnt sienna, Burnt umber, Ultramarine , Sap green and Spectrum crimson.3. Brush. I use various sizes and brands. I use a long flat brush size 6 for the background, Filbert brushes size 2, 4, 6 for rendering the lemon and a round brush size 2 for the details.4. Acrylic paint : Burnt sienna to tone the canvas as a base colour5. Oil painting medium. I use Schmincke medium W as it allows me to dilute the oil paint with water and also clean the brushes with water, too. No turps require! (Link about medium W)6. White colour pencil for drawing the subject outline on canvas.7. Reference photo Let's start! 1. I start by priming the canvas with gesso for one coat. I use Winsor & Newton white gesso primer ( I got this one on special from Eckersley) but you can use any brand that you have. Once dried, I mix the acrylic paint (Burnt sienna) with water in quite a thin consistency and apply thinly on the whole canvas. And the canvas is ready to paint! 2. Base on my reference photo, I use grid method to transfer the image onto the canvas (For anyone who have no idea about the grid method, Here is a link about it : Grid method). Then I use a white colour pencil to draw the line and roughly draw the lemon including the shadow. (Sorry I don't have a photo for this stage.) 3. I figure out the easy way to start this painting is to block in all the background first. So I use a small brush with a thin black oil paint to draw all the outlines of the subject on top of the colour pencil drawing and start to block in the background. I didn't use the black colour from the tube. I mix my own black colour by mixing one part of Ultramarine and one part of burnt sienna for just enough to cover the background area of the top part of the painting.
4. Continue blocking in the top part using a long flat brush until cover the whole area.
5. On the bottom part of the painting. I want to have a hint of purple in the background to generate glow into the painting. So I add more ultramarine and slowly add a hint of Crimson into the black mixture and play around in mixing until the right colour that I am happy with. And I continue blocking in the background of the bottom part. I also start to apply a thin layer of the black paint onto the reflection of the lemon.
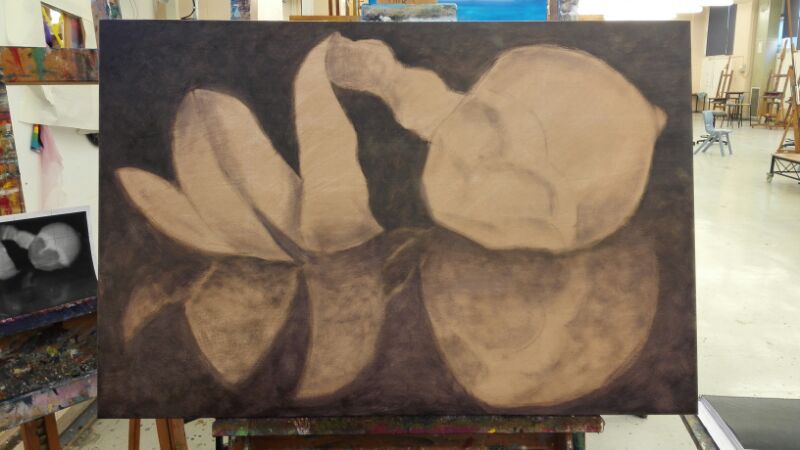
6. Now I start on painting the lemon. Again I start from left to right. From the peeled part of the lemon. I didn't paint much detail at this stage. Just to cover up the area first. So at this stage, it will look quite flat.

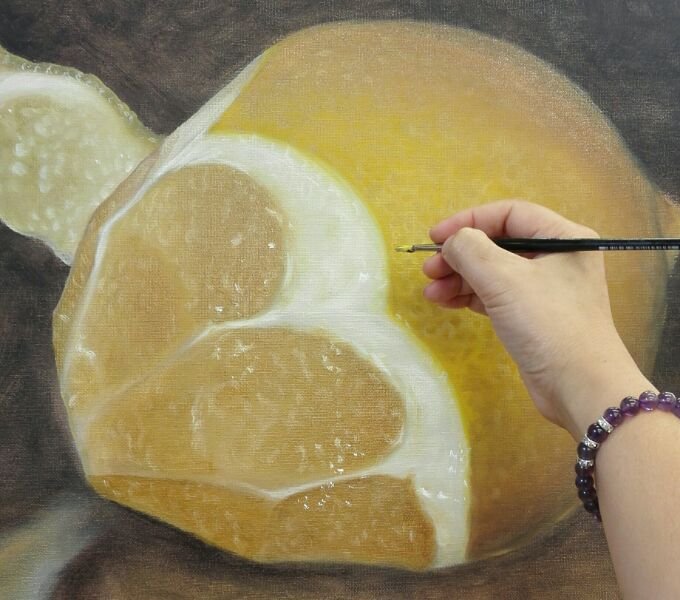
7. Then move on to the lemon. I add little details here and there. Basically just to please myself when I paint along. I find that it really help me feel more enjoyable in painting. I also apply some darker tone onto the shape of the lemon so it looks more round.

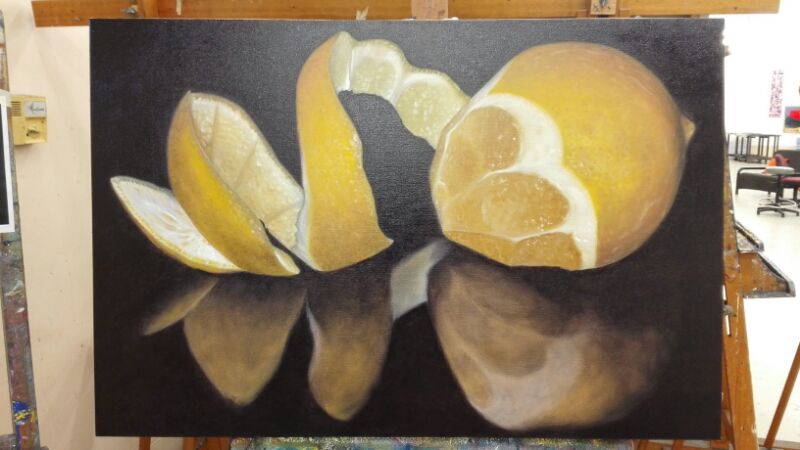
8. Once I am happy with the lemon. I move on to the reflection. Again I paint it quite flat just to cover the area.

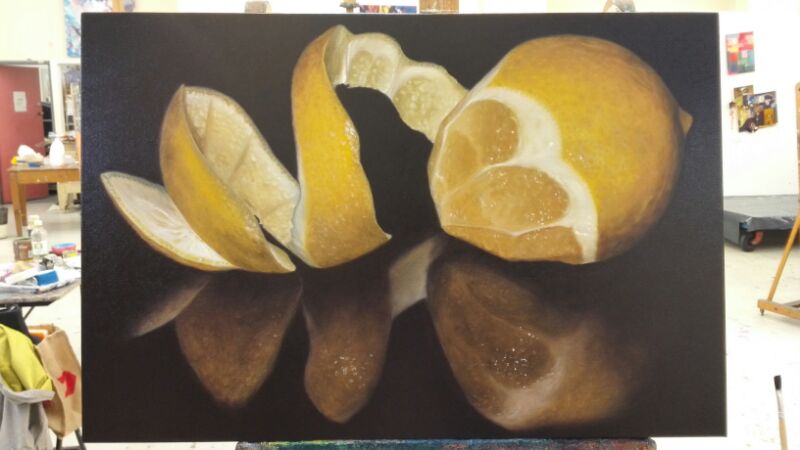
9. Then I apply the second layer to the background with the same black mixture until cover all the background area.
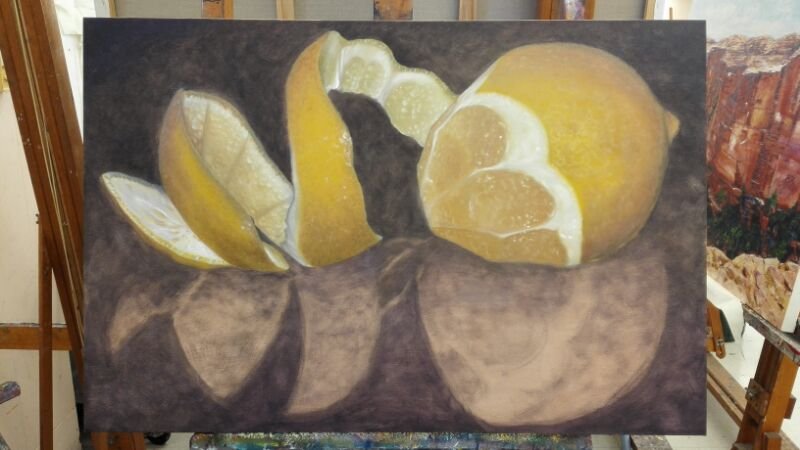
10. I came back for work on the reflection again. I add more details and working on tonal value of the whole painting. I spend quite some time at this stage to get the result as close as the reference photo and as how I feel until I reach the stage I am happy with the painting. And Ta Da !
And this is a slideshow video of the whole process.
Thank you. I hope you enjoy and please feel free to leave comments.See more of my painting at http://www.facebook.com/NatashaJunmaneeOr visit my Youtube channel : NJ Fine Art