How to paint a mandarin orange in oil
MATERIALS
- Pre-stretched canvas 100x75 cm.
- White pastel pencil for drawing.
- Schmincke medium W. This painting medium allows me to mix the oil paint with water, removing the need to use turps in the painting or cleaning process.
- Winsor & Newton Liquin impasto for glazing.
- Acrylic paint : Burnt sienna+Red oxide to tone the canvas as a base colour
- Oil paints. I use Art spectrum brand.
Titanium white, Lemon yellow, Yellow ochre, Burnt sienna, Burnt umber, Ultramarine, Spectrum crimson, Spectrum orange, Ivory black
- Brushes. I use various brands and materials(Hog hair/Synthetic)
Long flat brush size 6 for the background
Filbert brushes size 2, 4, 6 for rendering the mandarin segments
Round brush size 2 and 0 for the details
Fan brush for blending
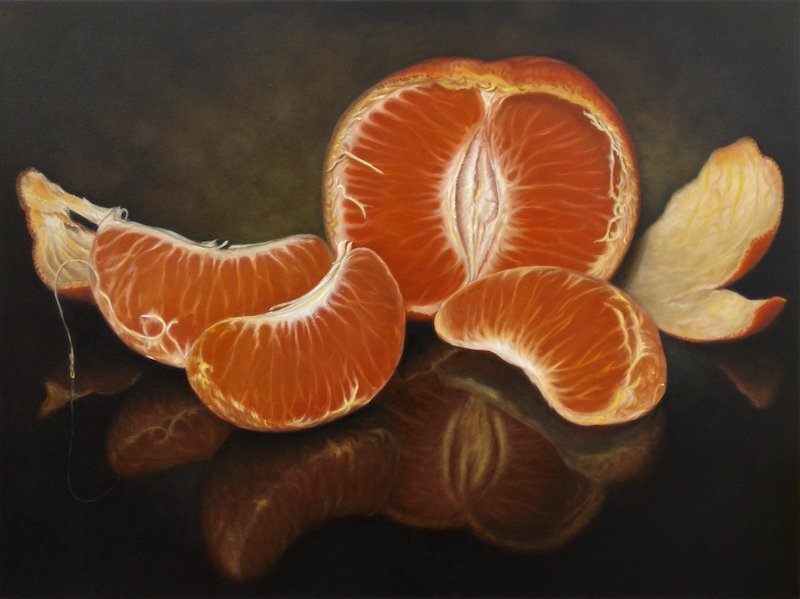
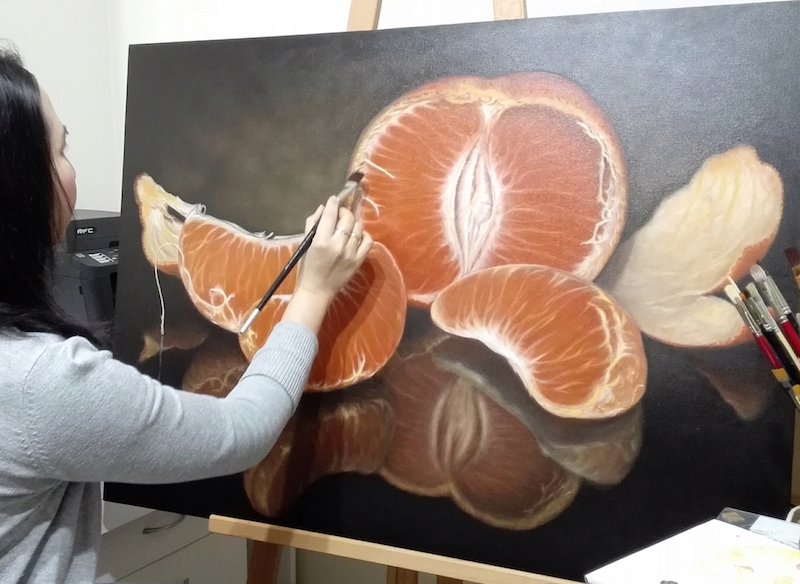
Reference photo
PROCESS
Step one
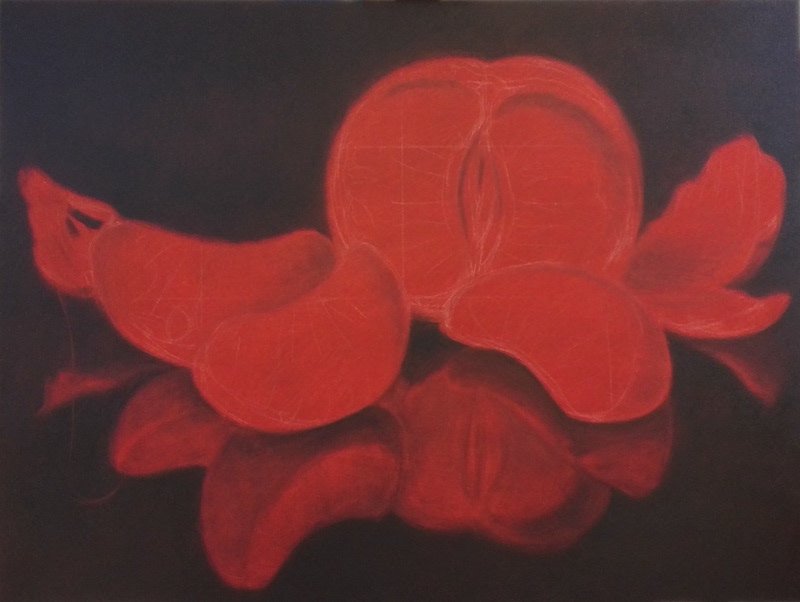
I start by toning the canvas in red as I want to have a red tint in this mandarin subject. I mix the acrylic paints Burnt sienna and Red oxide with water in diluted form and apply thinly to the whole canvas as a base colour and let dry.
I then transfer the image from my reference photo to the canvas using the grid method. This helps me to get the right proportions of the flower onto the canvas. I don't normally copy exactly the same as the reference, adding some of my own creativity into the image to make the composition look more interesting.
I use a white pastel pencil to draw the grid line and roughly draw the mandarin including the reflection.

Step two
I begin to block in all the background using a long flat brush. I create my own black colour by mixing equal parts of Ultramarine and Burnt sienna with medium W and a little water for just enough to cover the background area. Working from top to bottom, I cover the whole area. I also start to add some tones onto the mandarin and its reflection.
Step three
Now I start on painting the mandarin. I work from left to right. For the mandarin segments I start by painting the pith of the segment first (Titanium white+Yellow ochre), and then fill in the orange colour(Spectrum orange+Yellow ochre) using filbert brushes and the fan brush to blend as I go. I don't paint much detail at this stage, just enough to establish the basic form of the painting.


Step four
Continuing to paint each segment, I smooth the edges as I go as hard edges make the painting look unrealistic. To achieve a soft edge finish, I use a soft dry round brush to glide over the edges until I get the soft edge that I am happy with.

Step five
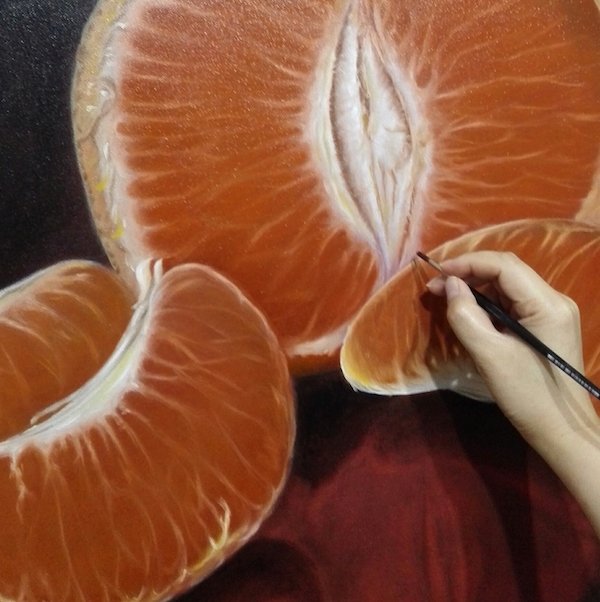
I now work on the mandarin half, adding more details as I go. I find that this really helps in my enjoyment of the painting process.
Step six
I keep working until I finish the whole mandarin, including its reflection and let it dry for a week. At this stage, I assess the painting overall. I can see that the reflection is a bit too prominent, and the mandarin also looks a bit too red and needs more detail.
Step seven
Once the painting is dry, I start adding the details, working closely with the reference photo. I don't normally copy the photo exactly, but try to look at it to get the essence of it and transfer that onto the canvas. I apply a darker tone to the reflection using a mixture of Liquid impasto, Burnt umber and Ivory black by thinly glazing the mixture over the reflection’s area. I also use the same technique to fix the colour of the mandarin using a mixture of Yellow ochre as a glaze.
I then have a look at the overall appearance of the painting again. I feel that the background looks quite flat, so I decide to mottle the background using a mixture of Titanium white, Yellow Ochre and Burnt sienna to create a glowing effect to the mandarin.
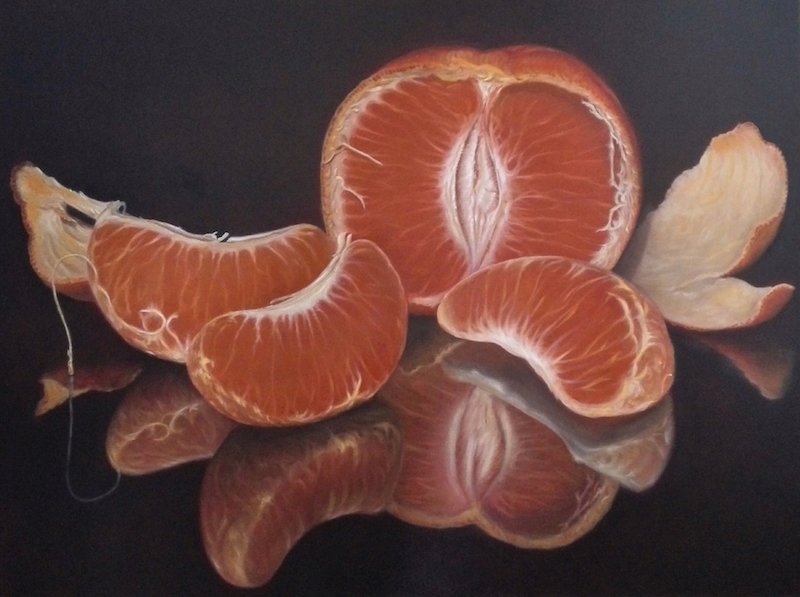
Final step
I now start to work on the reflection again. I also add more details and work on the tonal value of the whole painting. I spend quite some time at this stage to get the result as close possible to the reference photo until I am happy with the result
I hope you enjoy watching the process.
Any comments are welcome.